要使用CSS制作图片轮播效果,我们可以结合HTML结构、CSS样式和少量JavaScript交互来实现,以下是详细的实现步骤和代码示例,涵盖从基础布局到高级动画效果的各种技巧。

基础HTML结构
首先需要构建一个包含图片容器、轮播图片和指示器的HTML结构,以下是典型的轮播组件结构:
<div class="carousel-container">
  <div class="carousel-track">
    <img src="image1.jpg" alt="Slide 1" class="carousel-slide">
    <img src="image2.jpg" alt="Slide 2" class="carousel-slide">
    <img src="image3.jpg" alt="Slide 3" class="carousel-slide">
  </div>
  <button class="carousel-button prev">❮</button>
  <button class="carousel-button next">❯</button>
  <div class="carousel-indicators">
    <span class="indicator active"></span>
    <span class="indicator"></span>
    <span class="indicator"></span>
  </div>
</div>
CSS样式设计
容器样式
设置轮播容器的基本样式,包括尺寸、溢出隐藏和相对定位:
.carousel-container {
  position: relative;
  width: 800px;
  height: 450px;
  margin: 0 auto;
  overflow: hidden;
  border-radius: 8px;
  box-shadow: 0 4px 12px rgba(0,0,0,0.15);
}
轨道和图片样式
使用CSS Grid或Flexbox创建可水平滚动的轨道:
.carousel-track {
  display: flex;
  transition: transform 0.5s ease-in-out;
  height: 100%;
}
.carousel-slide {
  min-width: 100%;
  height: 100%;
  object-fit: cover;
}
按钮样式
设计导航按钮的样式,包括绝对定位和悬停效果:
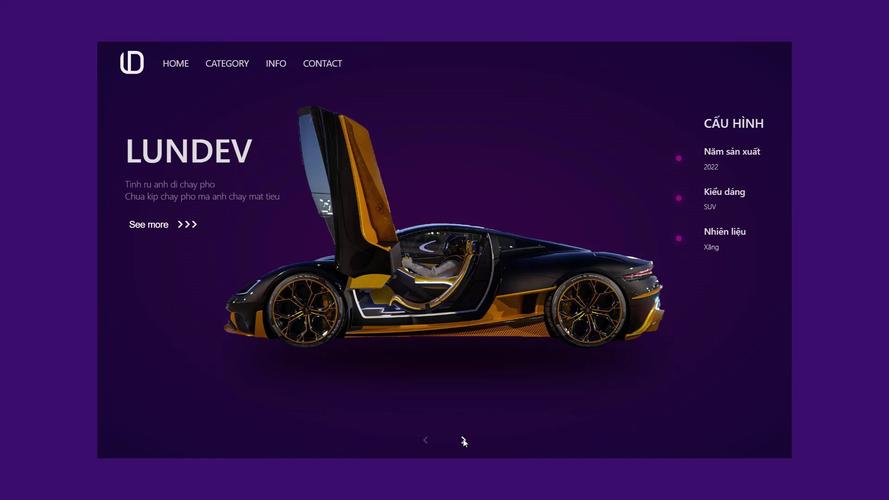
.carousel-button {
  position: absolute;
  top: 50%;
  transform: translateY(-50%);
  background: rgba(255,255,255,0.8);
  border: none;
  width: 50px;
  height: 50px;
  border-radius: 50%;
  cursor: pointer;
  font-size: 20px;
  transition: all 0.3s ease;
  z-index: 10;
}
.carousel-button:hover {
  background: rgba(255,255,255,0.95);
  box-shadow: 0 2px 8px rgba(0,0,0,0.2);
}
.prev {
  left: 20px;
}
.next {
  right: 20px;
}
指示器样式
创建底部指示器,显示当前轮播位置:
.carousel-indicators {
  position: absolute;
  bottom: 20px;
  left: 50%;
  transform: translateX(-50%);
  display: flex;
  gap: 10px;
}
.indicator {
  width: 12px;
  height: 12px;
  border-radius: 50%;
  background: rgba(255,255,255,0.5);
  cursor: pointer;
  transition: all 0.3s ease;
}
.indicator.active {
  background: white;
  transform: scale(1.2);
}
JavaScript交互实现
基础轮播逻辑
添加JavaScript实现自动轮播和手动控制:
const track = document.querySelector('.carousel-track');
const slides = document.querySelectorAll('.carousel-slide');
const prevButton = document.querySelector('.prev');
const nextButton = document.querySelector('.next');
const indicators = document.querySelectorAll('.indicator');
let currentIndex = 0;
const slideWidth = slides[0].clientWidth;
function updateCarousel() {
  track.style.transform = `translateX(-${currentIndex * slideWidth}px)`;
  indicators.forEach((indicator, index) => {
    indicator.classList.toggle('active', index === currentIndex);
  });
}
function nextSlide() {
  currentIndex = (currentIndex + 1) % slides.length;
  updateCarousel();
}
function prevSlide() {
  currentIndex = (currentIndex - 1 + slides.length) % slides.length;
  updateCarousel();
}
// 事件监听
nextButton.addEventListener('click', nextSlide);
prevButton.addEventListener('click', prevSlide);
// 自动轮播
setInterval(nextSlide, 5000);
// 指示器点击事件
indicators.forEach((indicator, index) => {
  indicator.addEventListener('click', () => {
    currentIndex = index;
    updateCarousel();
  });
});
高级效果实现
平滑过渡动画
使用CSS的transition属性实现平滑的滑动效果:
.carousel-track {
  transition: transform 0.6s cubic-bezier(0.25, 0.46, 0.45, 0.94);
}
渐变遮罩效果
添加渐变遮罩增强视觉效果:

.carousel-container::after {
  content: '';
  position: absolute;
  top: 0;
  left: 0;
  right: 0;
  bottom: 0;
  background: linear-gradient(to bottom, transparent 70%, rgba(0,0,0,0.3));
  pointer-events: none;
}
响应式设计
使用媒体查询适配不同屏幕尺寸:
@media (max-width: 768px) {
  .carousel-container {
    width: 100%;
    height: 300px;
  }
  .carousel-button {
    width: 40px;
    height: 40px;
    font-size: 16px;
  }
  .prev {
    left: 10px;
  }
  .next {
    right: 10px;
  }
}
性能优化技巧
- 图片懒加载:使用
loading="lazy"属性延迟加载非首屏图片 - 硬件加速:为轮播轨道添加
will-change: transform属性 - 触摸滑动:添加触摸事件支持移动端滑动
.carousel-track {
  will-change: transform;
}
/* 触摸滑动样式 */
.carousel-container {
  touch-action: pan-y;
}
常见轮播效果对比
| 效果类型 | 实现方式 | 优点 | 缺点 |
|---|---|---|---|
| 水平滑动 | transform: translateX | 性能好,兼容性强 | 需要计算宽度 |
| 淡入淡出 | opacity + position | 实现简单 | 需要绝对定位 |
| 3D翻转 | transform-style: preserve-3d | 视觉效果炫酷 | 兼容性要求高 |
| 缩放切换 | scale + opacity | 动态感强 | 性能消耗大 |
完整代码示例
以下是整合所有功能的完整代码:
<!DOCTYPE html>
<html lang="zh-CN">
<head>
  <meta charset="UTF-8">
  <meta name="viewport" content="width=device-width, initial-scale=1.0">CSS图片轮播</title>
  <style>
    * {
      margin: 0;
      padding: 0;
      box-sizing: border-box;
    }
    body {
      font-family: Arial, sans-serif;
      background: #f5f5f5;
      padding: 40px 0;
    }
    .carousel-container {
      position: relative;
      width: 800px;
      height: 450px;
      margin: 0 auto;
      overflow: hidden;
      border-radius: 8px;
      box-shadow: 0 4px 12px rgba(0,0,0,0.15);
    }
    .carousel-track {
      display: flex;
      transition: transform 0.6s cubic-bezier(0.25, 0.46, 0.45, 0.94);
      height: 100%;
      will-change: transform;
    }
    .carousel-slide {
      min-width: 100%;
      height: 100%;
      object-fit: cover;
    }
    .carousel-button {
      position: absolute;
      top: 50%;
      transform: translateY(-50%);
      background: rgba(255,255,255,0.8);
      border: none;
      width: 50px;
      height: 50px;
      border-radius: 50%;
      cursor: pointer;
      font-size: 20px;
      transition: all 0.3s ease;
      z-index: 10;
    }
    .carousel-button:hover {
      background: rgba(255,255,255,0.95);
      box-shadow: 0 2px 8px rgba(0,0,0,0.2);
    }
    .prev {
      left: 20px;
    }
    .next {
      right: 20px;
    }
    .carousel-indicators {
      position: absolute;
      bottom: 20px;
      left: 50%;
      transform: translateX(-50%);
      display: flex;
      gap: 10px;
    }
    .indicator {
      width: 12px;
      height: 12px;
      border-radius: 50%;
      background: rgba(255,255,255,0.5);
      cursor: pointer;
      transition: all 0.3s ease;
    }
    .indicator.active {
      background: white;
      transform: scale(1.2);
    }
    .carousel-container::after {
      content: '';
      position: absolute;
      top: 0;
      left: 0;
      right: 0;
      bottom: 0;
      background: linear-gradient(to bottom, transparent 70%, rgba(0,0,0,0.3));
      pointer-events: none;
    }
    @media (max-width: 768px) {
      .carousel-container {
        width: 100%;
        height: 300px;
      }
      .carousel-button {
        width: 40px;
        height: 40px;
        font-size: 16px;
      }
      .prev {
        left: 10px;
      }
      .next {
        right: 10px;
      }
    }
  </style>
</head>
<body>
  <div class="carousel-container">
    <div class="carousel-track">
      <img src="https://picsum.photos/seed/slide1/800/450.jpg" alt="Slide 1" class="carousel-slide">
      <img src="https://picsum.photos/seed/slide2/800/450.jpg" alt="Slide 2" class="carousel-slide">
      <img src="https://picsum.photos/seed/slide3/800/450.jpg" alt="Slide 3" class="carousel-slide">
    </div>
    <button class="carousel-button prev">❮</button>
    <button class="carousel-button next">❯</button>
    <div class="carousel-indicators">
      <span class="indicator active"></span>
      <span class="indicator"></span>
      <span class="indicator"></span>
    </div>
  </div>
  <script>
    const track = document.querySelector('.carousel-track');
    const slides = document.querySelectorAll('.carousel-slide');
    const prevButton = document.querySelector('.prev');
    const nextButton = document.querySelector('.next');
    const indicators = document.querySelectorAll('.indicator');
    let currentIndex = 0;
    const slideWidth = slides[0].clientWidth;
    function updateCarousel() {
      track.style.transform = `translateX(-${currentIndex * slideWidth}px)`;
      indicators.forEach((indicator, index) => {
        indicator.classList.toggle('active', index === currentIndex);
      });
    }
    function nextSlide() {
      currentIndex = (currentIndex + 1) % slides.length;
      updateCarousel();
    }
    function prevSlide() {
      currentIndex = (currentIndex - 1 + slides.length) % slides.length;
      updateCarousel();
    }
    nextButton.addEventListener('click', nextSlide);
    prevButton.addEventListener('click', prevSlide);
    setInterval(nextSlide, 5000);
    indicators.forEach((indicator, index) => {
      indicator.addEventListener('click', () => {
        currentIndex = index;
        updateCarousel();
      });
    });
    // 响应式调整
    window.addEventListener('resize', () => {
      const newSlideWidth = slides[0].clientWidth;
      track.style.transform = `translateX(-${currentIndex * newSlideWidth}px)`;
    });
  </script>
</body>
</html>
相关问答FAQs
问题1:如何实现无限循环轮播效果?
解答:可以通过在轨道首尾添加额外图片并调整逻辑来实现无限循环,具体做法是在轨道前后各添加一张图片(最后一张和第一张),当轮播到边界时,通过快速切换到对应位置并重置transform值来实现无缝循环,需要配合CSS的transition属性和JavaScript的setTimeout函数来处理过渡效果。
问题2:如何优化轮播组件的性能?
解答:优化轮播性能可以从以下几个方面入手:1) 使用CSS transform代替left/top属性,利用GPU加速;2) 为轮播轨道添加will-change: transform属性提前告知浏览器优化;3) 使用requestAnimationFrame代替setInterval实现更流畅的动画;4) 对于大量图片,使用Intersection Observer API实现懒加载;5) 在移动端添加touch事件支持,减少不必要的DOM操作。

