当然可以!制作网页搜索栏是一个非常基础且重要的前端技能,下面我将从简单到复杂,为你详细讲解如何制作一个搜索栏,并提供不同场景下的代码示例。

(图片来源网络,侵删)
第一步:最基础的 HTML 结构
无论多复杂的搜索栏,其核心都是 HTML 表单,最简单的版本只需要一个输入框和一个按钮。
代码示例:
<form action="/search" method="get">
  <input type="text" name="q" placeholder="请输入搜索内容...">
  <button type="submit">搜索</button>
</form>
代码解析:
<form>: 这是表单的容器。action="/search": 指定表单提交后,数据将被发送到服务器的哪个 URL,这里是一个占位符,你需要将其替换为你实际的搜索处理脚本地址。method="get": 指定提交数据的方式。GET方式会将搜索词以?q=搜索内容的形式附加在 URL 后面,适合搜索这种不敏感的操作。POST方式则将数据放在请求体中,更安全,适合登录等操作。
<input>: 这是输入框。type="text": 定义输入框为单行文本输入。name="q": 非常重要!这是输入字段的名称,服务器将通过这个名称来获取你输入的内容。q是query(查询)的常用缩写。placeholder="请输入搜索内容...": 当输入框为空时,显示的提示文本,当用户开始输入时会自动消失。
<button>: 这是提交按钮。type="submit": 点击此按钮会触发表单的action所定义的提交行为。
第二步:使用 CSS 美化搜索栏
纯 HTML 的搜索栏非常简陋,我们可以用 CSS 来美化它,让它看起来更现代、更美观。
目标样式:
- 让输入框和按钮在同一行。
- 增加圆角、边框、内边距等。
- 添加悬停效果。
CSS 代码:
/* 1. 基础样式:去除默认边距和轮廓 */
.search-form {
  display: flex; /* 使用 Flexbox 布局,让子元素水平排列 */
  align-items: center; /* 垂直居中对齐 */
  width: 100%;
  max-width: 500px; /* 设置一个最大宽度 */
  margin: 20px auto; /* 上下外边距20px,左右自动居中 */
}
.search-input {
  flex-grow: 1; /* 让输入框占据所有可用空间 */
  padding: 12px 15px;
  font-size: 16px;
  border: 1px solid #ccc;
  border-radius: 25px 0 0 25px; /* 左边圆角 */
  outline: none; /* 去除点击时的轮廓线 */
}
.search-input:focus {
  border-color: #007bff; /* 获得焦点时改变边框颜色 */
}
.search-button {
  padding: 12px 20px;
  font-size: 16px;
  color: white;
  background-color: #007bff; /* 蓝色背景 */
  border: 1px solid #007bff;
  border-radius: 0 25px 25px 0; /* 右边圆角 */
  cursor: pointer; /* 鼠标悬停时显示手型 */
  transition: background-color 0.3s; /* 背景色过渡效果 */
}
.search-button:hover {
  background-color: #0056b3; /* 鼠标悬停时加深背景色 */
}
完整代码 (HTML + CSS):
将 CSS 放在 <style> 标签中,或链接到外部 .css 文件。
<!DOCTYPE html>
<html lang="zh-CN">
<head>
  <meta charset="UTF-8">
  <meta name="viewport" content="width=device-width, initial-scale=1.0">美化后的搜索栏</title>
  <style>
    /* 将上面的 CSS 代码放在这里 */
    .search-form {
      display: flex;
      align-items: center;
      width: 100%;
      max-width: 500px;
      margin: 20px auto;
    }
    .search-input {
      flex-grow: 1;
      padding: 12px 15px;
      font-size: 16px;
      border: 1px solid #ccc;
      border-radius: 25px 0 0 25px;
      outline: none;
    }
    .search-input:focus {
      border-color: #007bff;
    }
    .search-button {
      padding: 12px 20px;
      font-size: 16px;
      color: white;
      background-color: #007bff;
      border: 1px solid #007bff;
      border-radius: 0 25px 25px 0;
      cursor: pointer;
      transition: background-color 0.3s;
    }
    .search-button:hover {
      background-color: #0056b3;
    }
  </style>
</head>
<body>
  <form class="search-form" action="/search" method="get">
    <input type="text" class="search-input" name="q" placeholder="搜索...">
    <button type="submit" class="search-button">搜索</button>
  </form>
</body>
</html>
你的搜索栏看起来就专业多了!

(图片来源网络,侵删)
第三步:添加搜索建议(进阶功能)
一个现代化的搜索栏通常带有“搜索建议”或“自动完成”功能,当用户输入时,下方会弹出相关提示词。
这需要 HTML + CSS + JavaScript 三者配合。
实现思路:
- HTML: 添加一个用于显示建议列表的
<div>。 - CSS: 样式化建议列表,使其看起来像一个下拉菜单。
- JavaScript:
- 监听输入框的
input事件。 - 当用户输入时,向服务器发送一个异步请求(AJAX)获取建议数据。
- 接收到数据后,动态创建
<li>元素并填充到建议列表中。 - 处理鼠标点击建议项的事件,将选中的内容填入输入框。
- 监听输入框的
代码示例:
<!DOCTYPE html>
<html lang="zh-CN">
<head>
  <meta charset="UTF-8">带搜索建议的搜索栏</title>
  <style>
    /* 基础搜索栏样式(同上) */
    .search-container {
      position: relative; /* 为下拉菜单提供定位上下文 */
      width: 100%;
      max-width: 500px;
      margin: 20px auto;
    }
    .search-form {
      display: flex;
    }
    .search-input {
      flex-grow: 1;
      padding: 12px 15px;
      font-size: 16px;
      border: 1px solid #ccc;
      border-radius: 25px 0 0 25px;
      outline: none;
    }
    .search-button {
      padding: 12px 20px;
      font-size: 16px;
      color: white;
      background-color: #007bff;
      border: 1px solid #007bff;
      border-radius: 0 25px 25px 0;
      cursor: pointer;
    }
    /* 搜索建议列表样式 */
    .suggestions {
      position: absolute; /* 相对于 .search-container 定位 */
      top: 100%; /* 放在输入框下方 */
      left: 0;
      right: 0;
      border: 1px solid #ddd;
      border-top: none;
      background-color: white;
      border-radius: 0 0 10px 10px;
      max-height: 200px;
      overflow-y: auto; /* 内容过多时显示滚动条 */
      display: none; /* 默认隐藏 */
      z-index: 1000;
    }
    .suggestion-item {
      padding: 10px 15px;
      cursor: pointer;
    }
    .suggestion-item:hover {
      background-color: #f0f0f0;
    }
  </style>
</head>
<body>
  <div class="search-container">
    <form class="search-form" action="/search" method="get">
      <input type="text" class="search-input" name="q" placeholder="输入关键词获取建议..." id="searchInput">
      <button type="submit" class="search-button">搜索</button>
    </form>
    <ul class="suggestions" id="suggestionsList"></ul>
  </div>
  <script>
    const searchInput = document.getElementById('searchInput');
    const suggestionsList = document.getElementById('suggestionsList');
    // 模拟一个从服务器获取建议的函数
    // 在实际项目中,这里会是 fetch('/api/suggest?q=' + keyword)
    function fetchSuggestions(keyword) {
      // 模拟数据
      const mockData = [
        'JavaScript 教程',
        'JavaScript 高级程序设计',
        'CSS 动画',
        'HTML5 新特性',
        'Vue.js 入门',
        'React 实战'
      ];
      return new Promise(resolve => {
        // 模拟网络延迟
        setTimeout(() => {
          const filteredData = mockData.filter(item => item.includes(keyword));
          resolve(filteredData);
        }, 300);
      });
    }
    searchInput.addEventListener('input', async (event) => {
      const keyword = event.target.value.trim();
      if (keyword.length < 1) {
        suggestionsList.style.display = 'none';
        return;
      }
      try {
        const suggestions = await fetchSuggestions(keyword);
        suggestionsList.innerHTML = ''; // 清空旧列表
        if (suggestions.length > 0) {
          suggestions.forEach(suggestion => {
            const li = document.createElement('li');
            li.className = 'suggestion-item';
            li.textContent = suggestion;
            // 点击建议项时,将内容填入输入框并隐藏列表
            li.addEventListener('click', () => {
              searchInput.value = suggestion;
              suggestionsList.style.display = 'none';
            });
            suggestionsList.appendChild(li);
          });
          suggestionsList.style.display = 'block'; // 显示列表
        } else {
          suggestionsList.style.display = 'none'; // 没有建议时隐藏
        }
      } catch (error) {
        console.error("获取建议失败:", error);
        suggestionsList.style.display = 'none';
      }
    });
    // 点击页面其他地方时隐藏建议列表
    document.addEventListener('click', (event) => {
      if (!event.target.closest('.search-container')) {
        suggestionsList.style.display = 'none';
      }
    });
  </script>
</body>
</html>
第四步:不同场景下的搜索栏
网站顶部的全局搜索栏
这种搜索栏通常位于网站导航栏中,用于全站内容搜索,它和基础搜索栏的 HTML/CSS 结构类似,但样式上要更紧凑,以适应导航栏的布局。
特点:

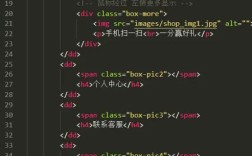
(图片来源网络,侵删)
- 通常位于
<header>标签内。 - 尺寸较小,样式简洁。
action指向全站搜索结果页。
数据表格或列表内的搜索栏
这种搜索栏用于在当前页面内筛选内容,无需跳转。
特点:
action属性通常为空或为 ,因为它不提交到服务器,而是通过前端 JavaScript 筛选 DOM 元素。- 它的核心功能是
keyup或input事件监听,然后实时隐藏/显示列表中的行。
简单实现思路:
const tableInput = document.getElementById("myTableSearch");
const table = document.getElementById("myTable");
tableInput.addEventListener("keyup", function() {
  let filterValue = this.value.toUpperCase();
  let rows = table.getElementsByTagName("TR");
  for (let i = 1; i < rows.length; i++) { // 从1开始,跳过表头
    let cells = rows[i].getElementsByTagName("TD");
    let found = false;
    for (let j = 0; j < cells.length; j++) {
      if (cells[j].textContent.toUpperCase().indexOf(filterValue) > -1) {
        found = true;
        break; // 找到匹配即可,无需继续检查该行的其他单元格
      }
    }
    rows[i].style.display = found ? "" : "none"; // 匹配则显示,否则隐藏
  }
});
移动端搜索栏
移动端设计需要考虑触摸体验。
特点:
- 输入框通常更大,方便点击。
- 按钮可以省略,直接通过键盘的“搜索”键提交。
- 占位符文字要更清晰。
- 布局通常是垂直堆叠。
HTML 示例:
<div class="mobile-search">
  <input type="search" class="search-input" name="q" placeholder="搜索产品、新闻或帮助...">
  <button type="submit" class="search-button">搜索</button>
</div>
CSS 示例:
.mobile-search {
  display: flex;
  flex-direction: column; /* 垂直排列 */
  width: 90%;
  margin: 10px auto;
}
.mobile-search .search-input {
  width: 100%;
  padding: 15px;
  font-size: 18px; /* 更大的字体 */
  border: 1px solid #ccc;
  border-radius: 10px;
  margin-bottom: 10px;
}
.mobile-search .search-button {
  padding: 15px;
  font-size: 18px;
  border-radius: 10px;
}
制作一个网页搜索栏的步骤如下:
- 确定需求:是全局搜索、页面筛选还是移动端?
- 编写 HTML 结构:使用
<form>,<input>,<button>搭建基础框架,并设置好action和name属性。 - 使用 CSS 美化:通过
display: flex、border-radius、padding、margin等属性,结合响应式设计,打造美观的界面。 - 添加交互逻辑(可选):如果需要搜索建议或页面内筛选,则使用 JavaScript 监听用户输入,并通过 DOM 操作或 AJAX 实现动态效果。
从最简单的表单开始,逐步添加样式和功能,你就可以构建出功能强大且用户体验良好的搜索栏。